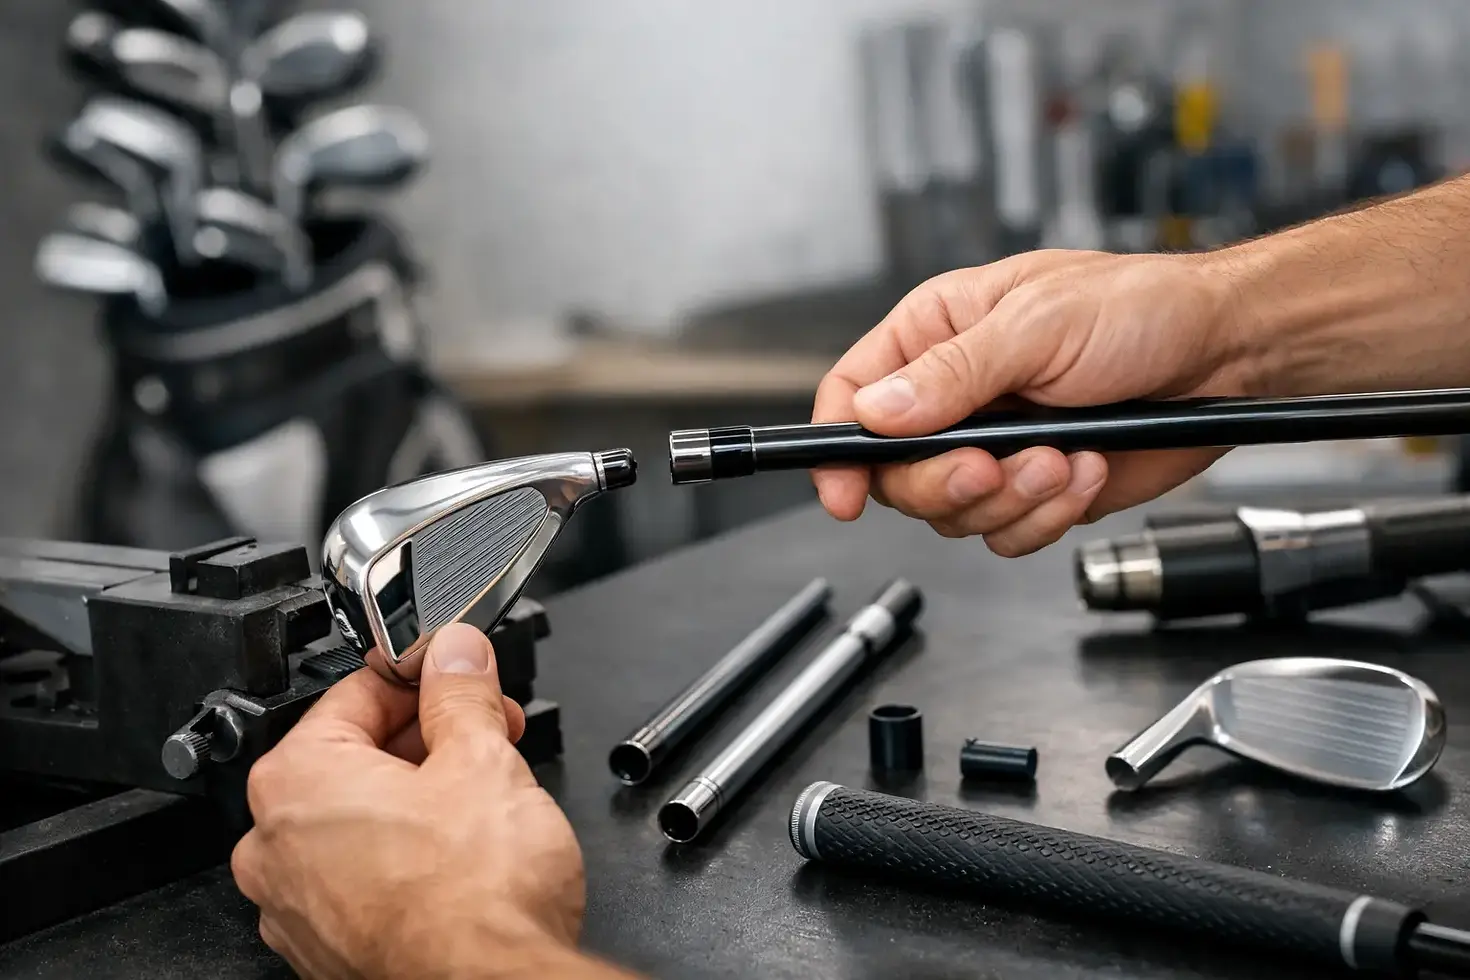
How to Replace Golf Shafts the Right Way
A golf club that feels loose, launches wrong, or simply no longer fits your swing can cost you more than a few yards. It can make the whole game feel harder than it needs to be. If you have been wondering how to replace golf shafts, the good news is that the process is very doable when you take your time, use the right tools, and stay honest about your skill level.
Replacing a shaft is not just a repair. It is also a chance to improve feel, ball flight, and consistency without buying a whole new set. For many golfers, especially those trying to stretch a budget, that matters.
When replacing a shaft makes sense
Sometimes a shaft has to be replaced because it is cracked, bent, or pulled loose at the head. That is the easy call. Other times, the reason is fit.
If your iron shafts feel too heavy by the back nine, or your driver shaft launches too low, replacement can be a smart move. The same is true if you bought preowned clubs that are solid heads but came with shafts that do not match your swing. A quality clubhead with the wrong shaft is still the wrong club.
This is where many golfers make an expensive mistake. They assume any shaft that fits the hosel is good enough. It is not. Weight, flex, launch profile, tip size, and finished playing length all matter. You can save money by re-shafting, but only if the finished club actually fits you.
Tools you need before you start
If you want to learn how to replace golf shafts at home, you need more than glue and good intentions. The basic setup includes a heat gun or torch, a shaft puller, a vise with rubber shaft clamps, epoxy made for golf clubs, a hosel cleaning tool or wire drill bit, sandpaper or belt sander for tip prep, a ruler, acetone, ferrules if needed, and grip supplies if the grip must come off.
Could you do it with less? Maybe. Should you? Usually no.
The biggest risk is damaging the clubhead during shaft removal. That risk is especially high with graphite shafts and with adjustable drivers, fairway woods, and hybrids. Excess heat can weaken epoxy in the wrong places, scorch paint, or even ruin a graphite tip section. If you are working on a club you cannot afford to replace, caution is the wise path.
How to replace golf shafts step by step
The actual process is straightforward, but each step matters.
Remove the old shaft carefully
Secure the club in a vise using a rubber clamp so you do not crush the shaft or mark it up. If the shaft is already broken, the job may be simpler, but if it is intact, apply controlled heat to the hosel area. A heat gun is slower but safer. A torch works faster but takes a steadier hand.
Once the epoxy softens, use a shaft puller to apply even pressure and remove the shaft. Do not twist aggressively by hand, especially with graphite. That is how clubheads get damaged and shafts splinter.
With steel shafts, you have a bit more forgiveness. With graphite, patience is everything.
Clean out the hosel
After the shaft is out, the hosel needs to be fully cleaned. Old epoxy left inside can keep the new shaft from seating properly, which affects both bond strength and final length.
Use a hosel brush, wire bit, or similar tool to remove epoxy residue. Wipe the inside clean and dry. This part is not glamorous, but attention to detail is paramount here. A sloppy bond usually starts with sloppy prep.
Prep the new shaft tip
The shaft tip has to be prepared so epoxy can bond properly. With a steel shaft, that usually means abrading the tip section lightly. With graphite, you need to remove the paint layer without cutting into the fibers. That calls for a gentle hand.
This is one of the biggest trade-offs in DIY work. Too little prep and the bond may fail. Too much prep and you weaken the shaft. If you are unsure, it is better to stop and ask for help than ruin a good shaft trying to force the job.
Before mixing epoxy, always dry fit the shaft into the head. Make sure the tip size matches. Common sizes include .355 taper and .370 parallel for irons, plus several wood and hybrid standards. If the fit is wrong, do not try to make it work with extra epoxy.
Install ferrule and set the shaft
If the club uses a ferrule, slide it onto the shaft before final assembly. Then mix your golf epoxy exactly as directed. Apply it to the prepped tip and lightly inside the hosel. Insert the shaft with a slow twisting motion so the epoxy spreads evenly.
At this stage, alignment matters. If the shaft has graphics, decide whether you want them up, down, or in a specific orientation. On adjustable sleeves, make sure the adapter is aligned properly before curing.
Wipe away excess epoxy and seat the ferrule cleanly against the hosel.
Let it cure fully
Do not rush this part. Set the club aside in a safe position and let the epoxy cure for the full recommended time. Some epoxies cure faster than others, but faster is not always better for every job.
If you cut, grip, or hit the club too early, you risk bond failure. A little patience now saves you from doing the same repair twice.
Cut to final length and install the grip
Once cured, measure the club for finished playing length and trim as needed. Depending on the shaft type and the build plan, trimming may happen from the tip, the butt, or both. Follow the shaft manufacturer's trimming instructions. Guesswork here changes flex and feel.
After cutting, install the grip and check final swing feel. A club can be technically assembled and still feel off if the balance is wrong. That is why experienced club builders pay attention not only to length but also to swing weight and total weight.
The part most golfers overlook: fit
Knowing how to replace golf shafts is one thing. Knowing which shaft should go in the club is something else.
A lighter shaft can help some golfers gain speed, but it can also make tempo worse. A stiffer shaft may tighten dispersion for one player and make another lose carry distance. Even butt diameter can affect comfort in the hands once the grip goes on.
That is why the best shaft replacement jobs start with honest questions. What is the current problem? What ball flight are you trying to change? Are you trying to save a favorite club or make a real performance upgrade?
There is no shame in keeping things simple. Many golfers do not need exotic aftermarket shafts. They need a dependable fit, solid installation, and clear advice they can trust.
DIY or let a shop handle it?
It depends on the club, your tools, and your comfort level.
If you are replacing an older steel iron shaft and already have a vise, proper epoxy, and a way to pull the old shaft safely, DIY can make sense. It can save money and teach you a useful skill.
If you are working on graphite woods, expensive heads, adjustable adapters, or a full set where consistency matters club to club, professional help is often the better value. One mistake can cost more than the labor you were trying to avoid.
That is where a family shop can be a real blessing. You are not paying for a sales pitch. You are getting hands-on service, honest guidance, and craftsmanship that respects your budget. At PaPa's Pro Shop, each customer is treated like family, and that matters when you are deciding whether to rebuild a club or move on from it.
Common mistakes that cause problems
Most shaft replacement issues come from a few preventable errors. Using the wrong shaft tip size, overheating the hosel, skipping proper prep, rushing cure time, and trimming incorrectly are the big ones. Another common problem is ignoring swing weight after the build. The club may look fine and still perform poorly.
There is also the temptation to replace a shaft when the real problem is elsewhere. Sometimes the grip size is wrong. Sometimes the lie angle is off. Sometimes the golfer simply needs more time with the club. Good repair work starts with the right diagnosis.
A better club does not always mean a brand-new club
For golfers trying to be wise with their money, shaft replacement can be one of the best ways to improve performance without overspending. A trusted clubhead with a better-fit shaft often beats a flashy off-the-rack club that never felt right in the first place.
Golf gives us enough to work on already. Your equipment should help, not fight you. If a shaft change gives you more confidence over the ball and a better chance to enjoy the round, that is money well spent and time well used.


Comments